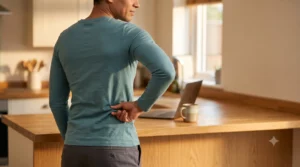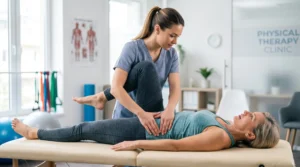
You lace up, step out, and a few minutes later your lower back starts nagging again. Low back pain from walking is a frustrating thing to live with, because the activity everyone tells you is good for your back is the one that hurts. It is also one of the more fixable problems in musculoskeletal practice, once you know which pattern you are dealing with.
The short answer: Walking provokes back pain when the lumbar spine has to absorb more load than it can currently tolerate — usually from a long stride, a slow cadence, a fatiguing lateral hip, or a posture held in slight extension. If the pain builds after a fairly set distance and eases when you lean forward or sit down, that points toward a stenosis-type pattern. If it builds with general fatigue and eases with rest in any position, it is more likely mechanical overload.

Key takeaways (read this first)
- Mechanics explain most cases. How you move, what you carry, and the surfaces and speeds you choose account for the majority of walking-related back pain — not structural damage.
- Form tweaks work within minutes. Shortening your stride, lifting cadence slightly, levelling the pelvis and freeing the arms often changes symptoms inside the same walk.
- Distance-to-onset is diagnostic. Pain that reliably starts after a set distance and eases with forward lean behaves differently from pain that builds with general fatigue, and the two need different plans.
- Capacity beats gadgets. A modest dose of hip and trunk strength work three to four days a week outperforms belts, insoles and posture devices.
- A short list of symptoms needs urgent care. Progressive leg weakness, saddle numbness, new bowel or bladder trouble, fever, or severe pain after trauma are not mechanical problems.
What causes low back pain from walking?
Walking is a rhythm of controlled falls. Each step sends force through the feet, legs, pelvis and spine, and when any link in that chain is overloaded or fatigued, irritated tissue complains. Rather than a single diagnosis, this covers several recognizable patterns — gait mechanics, hip endurance, joint sensitivity, nerve compression and carried load. Identifying which one you have is what makes the fix obvious.
The usual suspects
- Overstride and low cadence. Long steps at a slow beat increase vertical bounce and braking force at each heel strike. The spine ends up damping more shock than it needs to, particularly on hard, flat surfaces.
- Glute and lateral hip weakness. When the hip abductors fatigue, the pelvis drops and wobbles side to side. The lumbar joints then have to stabilize with every single step, which is why symptoms climb the longer you walk.
- Stenosis pattern. A narrowed spinal canal can crowd nerve tissue when the back is upright or arched. Symptoms begin after a fairly predictable distance and ease when you lean forward on a cart or railing — the classic “shopping cart sign.”
- Facet joint irritation. The facets are small paired joints at the back of the spine. Walking briskly with a deep arch compresses them, and symptoms tend to settle when you slow down or soften the ribs.
- Disc-related sensitivity. A sensitive disc dislikes prolonged extension and heavy axial load. Some people notice a flare only with a backpack, yet feel better on gentle uphill routes that allow a slightly flexed posture.
- SI joint overload. If one leg accepts more load, or you carry a bag on one side, the sacroiliac joint gets cranky and refers into the buttock in time with your steps.
- Foot and ankle mechanics. Stiff ankles, rigid soles or persistently cambered ground reduce shock absorption low down, so more force travels north.
- Deconditioning and fatigue. Detrained tissue tolerates the first ten minutes fine, then complains as the muscles that were protecting the spine give out.
Quick pattern matcher
Use these snapshots to narrow your driver and select a starting fix.
| If your pain behaves like this… | Likely driver | First tweak to try |
|---|---|---|
| Starts after 5–15 minutes, eases when you lean forward on a cart | Neurogenic claudication (stenosis-type) | Slight forward lean, shorter steps, consider slight uphill |
| Worse on fast, long-stride walks on flat concrete | Overstride + low cadence | Shorten stride 10%, raise cadence by ~5–10% |
| Flare with backpack or heavy purse | Extension/disc or SI joint load | Lighten/redistribute load; chest strap; alternate sides |
| Worse downhill; better slight uphill | Facet irritation or over-arch | Tuck ribs softly; keep pelvis level; reduce downhill time |
| One-sided buttock ache that pulses with steps | SI joint overload or hip weakness | Use two-strap backpack; add lateral hip strength |
| Only on very uneven trails or stiff shoes | Foot/ankle stiffness | Mobilize ankles; choose flexible shoes for longer walks |
Why does my back only start hurting after a certain distance?
Because tissue tolerance is a budget, not a switch. Early in a walk you have reserve, so small inefficiencies cost you nothing. As the lateral hip and trunk muscles fatigue, the pelvis begins dropping and the lumbar spine picks up the slack, so symptoms appear at roughly the same point each time. A consistent distance-to-onset is useful information rather than a bad sign.
Track that number. If your pain reliably arrives at eight minutes, then eight minutes is your current tolerance, and the plan is to walk comfortably inside it while raising the ceiling — not to keep pushing to fifteen and paying for it that evening. A distance-to-onset that moves out week by week is the clearest evidence your program is working, and it is a far better progress marker than how the pain feels on any single day.
Is it mechanical fatigue or neurogenic claudication?
The difference is in what relieves it. Mechanical fatigue pain eases with rest in almost any position — standing still, sitting, or lying down all help. Neurogenic claudication, the leg-dominant pain associated with lumbar spinal stenosis, is specifically posture-dependent: it eases when the spine bends forward and returns when you straighten up, even if you never sat down.
This is why people with a stenosis pattern often report they can push a shopping cart around a supermarket for an hour but cannot stand in the checkout queue for five minutes, and why they tolerate walking uphill better than downhill. Standard clinical descriptions note that lumbar extension increases symptoms while flexion decreases them, with relief typically coming from sitting or leaning forward at the waist (Munakomi and colleagues, StatPearls, NCBI Bookshelf).
| Feature | Mechanical fatigue pain | Neurogenic claudication (stenosis-type) |
|---|---|---|
| Where it is felt | Mostly central or one-sided low back | Back plus buttock, thigh or calf; often both legs |
| What it feels like | Aching, tired, muscular | Heaviness, cramping, burning, or pins and needles |
| Onset | Builds gradually with overall fatigue | Comes on after a fairly repeatable distance |
| What relieves it | Rest in almost any position | Specifically bending forward — sitting, leaning on a cart or railing |
| Standing still | Usually gives some relief | Often no relief; symptoms may still build |
| Uphill vs downhill | Uphill usually harder | Uphill often easier; downhill worse (more extension) |
| Cycling | Broadly similar to walking | Usually much better tolerated (flexed posture) |
If your pattern sits firmly in the right-hand column, keep walking — but bias toward flexion-friendly routes and arrange a proper assessment rather than trying to stretch your way out of it.
Should I push through the pain or stop?
Push through mild, familiar aching; stop for anything neurological. A workable rule is the 4-out-of-10 ceiling: if symptoms stay at or below 4/10, settle within about half an hour of finishing, and are no worse the next morning, walking is doing its job. Stop and reassess if pain climbs past that, or if leg heaviness, numbness or weakness appears.
- Keep going if the ache is familiar, stays under 4/10, and eases when you apply a form cue such as shortening your stride.
- Take a 60–90 second break — a standing forward lean on a railing — if symptoms creep up, then resume with a shorter stride.
- End the session if pain passes 5/10, if you start limping, or if leg symptoms appear or spread.
- Stop and seek assessment for new weakness, foot drop, saddle numbness, or any change in bladder or bowel control.
The morning-after check is the most reliable single test. Soreness that has settled by breakfast means the dose was about right. Pain that is clearly worse the next day means the walk was too long, too fast, or too heavily loaded — reduce one of those three variables, not all three at once, or you will not learn which one mattered.
How do I fix low back pain from walking?
Pair form tweaks with small, consistent strength work. The form changes buy you comfort inside the walk you are taking today; the strength work raises the distance at which symptoms appear at all. Doing only one of the two is the single most common reason people stall after an encouraging first week. Here is a blueprint you can start immediately.
Step 1: Reset the walk
- Cadence: Count steps for 30 seconds and double it. If you’re under ~110–115 steps/min, bump the beat by 5–10%. A quicker rhythm with shorter steps usually helps immediately.
- Stride: Think “soft feet, short steps.” Keep your foot landing close to your body to limit braking forces.
- Torso: Imagine a light magnet pulling your breastbone forward, not upward. This quiets the excessive arching that feeds the problem.
- Arms: Let them swing. Stiff arms increase trunk rotation demands.
- Pelvis: Level the headlights (your ASIS) straight ahead. A level pelvis cuts the rotational stress that accumulates on one side.
👨⚕️ Dr. Arora’s Clinical Note:
Patients often ask whether they should “stand taller” or “pull the shoulders back” to stop the pain. Counter-intuitively, that cue often makes things worse because it increases lumbar extension (arching) and facet joint compression—especially in people whose pain shows up after 5–15 minutes and improves with a slight forward lean.Try this simple 60-second walking test on your next walk:
- Exhale fully once (as if fogging a mirror), then let your ribs soften down—not slumped, just “stacked.”
- Shorten your stride by about one shoe-length and keep a slight forward hinge from the hips (5–10%, not a rounded back).
- Maintain a quieter pelvis (no side-to-side dip).
If your discomfort drops noticeably within 1–2 minutes, you’re likely dealing with an extension-sensitive load problem, not a “weak back that needs bracing.” In that case, the fastest progress usually comes from cadence + stride control and lateral hip endurance, before adding aggressive back-bending stretches or long downhill walks.
Step 2: Choose smart routes and loads
- Prefer slight uphill over steep downhill if your pain fits a facet or extension-sensitive pattern.
- On sidewalks, favor softer paths or tracks when available; the surface is kinder to already-irritated tissue.
- Keep hands free and use a two-strap backpack with a chest strap. Alternate which hand carries grocery bags so the load does not always land on the same side.
- Start with 10–15 minute loops and add 2–3 minutes every other session as tolerated.
Step 3: Micro-breaks that don’t derail momentum
Use a 90/30 rule: every 90 seconds of walking, spend 30 seconds focusing on one cue—short stride, level pelvis, soft ribs, easy arms. If symptoms climb above a 4/10, take a 60–90 second standing forward lean on a railing, then resume. These brief resets keep you moving instead of turning a mild flare into a lost week.
Step 4: Strength that pays rent
Two or three sets per exercise, 8–12 smooth reps, three or four days per week.
- Lateral hip strength (anti-wobble): Side-lying leg raises, banded side steps, and single-leg stands with a wall touch. Strong hip abductors stop the pelvic drop that forces the lumbar spine to stabilize on every step.
- Hip extension strength: Bridges, hip thrusts, and step-ups. Restoring hip power reduces the need to over-arch the low back.
- Core anti-rotation: Tall-kneeling press-outs (Pallof), dead bug holds, and suitcase carries in short sets. These teach the trunk to resist the twist that accumulates over distance.
- End-range control: Cat-camel in small ranges and segmental bridge roll-downs to keep the spine comfortable moving through flexion/extension.
Step 5: Mobility where it matters
- Ankles: Wall ankle mobilizations (knee to wall) for 1–2 minutes per side. Better ankle motion lets you shorten your stride without feeling “stuck.”
- Hips: 90/90 transitions and kneeling hip flexor stretches with a posterior pelvic tilt for 30–45 seconds, two rounds each side.
- Thoracic spine: Seated reach-throughs and open-book rotations; 5–8 smooth reps per side.
Step 6: Progression over 2–4 weeks
Progress on response, not on the calendar. Move to the next week only once you meet the criterion in the right-hand column. Repeating a week is normal and is not a setback.
| Week | Walking dose | Strength & mobility | Ready to progress when |
|---|---|---|---|
| Week 1 | 10–15 minute loops on level or soft surfaces, applying the form cues | Strength or mobility on alternate days | Symptoms drop within the session when you apply a cue, and settle within 30 minutes of finishing |
| Week 2 | Add 2–3 minutes per walk; introduce gentle inclines if tolerated | Three sessions; add load to bridges and side steps | You complete each walk at or under 4/10 with no increase the next morning |
| Week 3 | Two longer walks of 20–30 minutes, one with a light two-strap backpack | Three to four sessions; progress to single-leg bridge and side plank | The pack adds no symptoms, and your distance-to-onset has clearly moved out |
| Week 4 | Maintain cadence and stride; add one interval day of 3 × 4 minutes brisk with 2 minutes easy | Four sessions; hold gains and add loaded carries | You finish sessions with minimal symptoms and recover fully by the following day |
The case for walking itself is unusually strong. In the WalkBack randomized controlled trial, adults recovering from an episode of low back pain who followed an individualised, progressive walking and education program had a lower risk of recurrence than those who did not, with a hazard ratio of 0.72 (95% CI 0.60–0.85) and a median time to recurrence of 208 days versus 112 days in the control group (Pocovi and colleagues, The Lancet, 2024). Walking is not merely tolerable after back pain — done progressively, it appears to be preventive.

Form tweaks that unload the spine
Small changes, big payoff.
Stride length and cadence
A stride roughly 10% shorter with a cadence 5–10% faster reduces vertical oscillation and braking force. Many people notice a change within a few minutes of holding it, which also makes this a useful test: pain that responds to stride and cadence is a loading problem, not a damaged structure.
Arm swing and trunk rotation
Relaxed arm swing balances rotational forces. If your arms are frozen by phone use or tight shoulders, the lumbar spine absorbs more of the twist. Stow the phone, free the arms, and let the ribcage rotate naturally.
Pelvic control
Imagine a full cup of tea on your sacrum—no spilling. Keeping the pelvis level distributes force evenly instead of letting it stack up on one side, which is what turns a general ache into a stubbornly one-sided one.
Shoes and surfaces
Use the most forgiving shoe that still feels stable. Very stiff soles on hard concrete add up over distance, and a moderate-cushion shoe or a softer track often takes the edge off. Replace shoes when the midsole stops rebounding rather than when the upper looks worn. On trails, watch for long cambered stretches, which quietly tilt the pelvis for the whole walk — if a route is cambered, turn around halfway so both sides share it.
Loads and bags
Two-strap backpacks with chest/waist straps keep loads close to your center, which reduces the extension and side-bend forces that provoke symptoms. Single-strap slings are fine for a short errand and poor for distance.
Strength & mobility menu (20–25 minutes, 3–4×/week)
Pick one from each category; rotate across the week.
A. Glutes & lateral hip
- Banded side steps (2 x 12–15 steps each way)
- Single-leg bridge (2 x 8–10/side)
- Step-ups (2 x 8/side)
B. Core (antirotation + endurance)
- Side plank (3 x 15–30 sec/side)
- Dead bug (3 x 6–8 slow reps)
- Tall-kneeling press-out (3 x 8 press/hold/return)
C. Hip flexor & thoracic mobility
- Half-kneeling hip flexor stretch with glute squeeze (2 x 30–45 sec/side)
- Open-book (2 x 6–8/side)
- Seated reach-through (2 x 6–8/side)
D. Ankle & foot
- Calf raises (2 x 12–15)
- Knee-to-wall ankle rocks (2 x 45–60 sec/side)
- Short-foot exercise (2 x 8–10 gentle holds)
Consistency here is what stops a calmed flare from returning six weeks later.
Age-specific patterns you can recognize
Teens & 20s
Training spikes, long study hours, and weak glutes dominate. Symptoms show up on fast, flat campus routes and after long days in stiff shoes. Priorities: stride/cadence reset, lateral hip strength, and ankle mobility.
30s & 40s
Work sitting + childcare lifting means stiffer hips and deconditioned trunk endurance. Pain typically arrives after 15–25 minutes and is worse with a backpack or pushing a stroller uphill. Priorities: antirotation core work and load management.
50s & 60s
Facet irritation and early stenosis are more common. People report trouble on downhills and relief when leaning forward on a railing. Priorities: gentle flexion-friendly routes, cadence up, hip extension strength.
70s & beyond
Bone health and balance matter more. Symptoms may blend with hip or spinal arthritis. Priorities: shorter, frequent walks with a partner or pole for balance, plus twice-weekly strength for hips, calves, and grip.
Prevention stack (weekly template)
Think layers: form + capacity + recovery.
- Walk smart: keep cadence brisk, stride modest, arms free.
- Strength 3–4×/wk: glutes, core, calves.
- Mobility snacks: 5 minutes ankles/hips most days.
- Load wisely: split groceries into two bags; use chest strap.
- Surfaces: choose parks or a track on long days.
- Sleep & stress: run a consistent wind-down; poor recovery magnifies pain.
- Progress: add time or incline, not both in the same week.
Myth vs fact
| Myth | Fact |
|---|---|
| “If walking hurts, I should rest until it’s 100% better.” | Gentle, well-cued walking is therapeutic. Graded exposure reduces the sensitivity driving the problem, and the WalkBack trial found progressive walking lowered the risk of recurrence. |
| “I need a brace to hold my back while I walk.” | Most people improve faster by training their own hip and core muscles; belts can be short-term aids, not solutions. |
| “Only expensive shoes fix this.” | Shoes matter, but cadence, stride, and strength shift loads more reliably than buying new gear. |
| “Downhill training builds toughness.” | Long descents load the facets in extension and often aggravate symptoms. Start level or slightly uphill. |
Red flags: when to seek medical care now
These findings take walking-related back pain out of the mechanical category. Each points toward something that will not respond to gait changes, and each warrants prompt assessment rather than a longer trial of self-management.
- Severe, unrelenting pain after a fall or accident — raises the possibility of fracture, particularly with osteoporosis or long-term steroid use.
- New bowel or bladder control problems — including difficulty starting or feeling the flow of urine; a potential sign of cauda equina compression, which is a same-day emergency.
- Numbness in the groin or saddle area — the same emergency concern, and easily missed because it can be painless.
- Progressive leg weakness or foot drop — suggests nerve compression that is worsening rather than settling.
- Fever, chills, or unexplained weight loss — points away from mechanical pain and toward infection or systemic illness.
- A history of cancer or osteoporosis with new back pain — lowers the threshold for imaging considerably.
If any of these are present, seek urgent evaluation rather than adjusting your walking plan. For symptoms that are simply persistent or worsening after two to four weeks of consistent self-care, arrange an in-person assessment so the plan can be matched to an actual examination.
Frequently asked questions
1. Why does walking hurt my back when sitting does not?
Sitting flexes the lumbar spine slightly, which opens the space around the facet joints and nerve roots and unloads them. Walking upright, especially with a long stride and slow cadence, increases compression and shear at those same structures. If sitting is your reliable relief, that points toward an extension-sensitive or stenosis-type pattern.
2. Does back pain when walking mean I have spinal stenosis?
Not usually. Stenosis is one specific pattern, marked by symptoms that begin after a repeatable distance, involve the legs, and ease with forward lean rather than rest alone. Gait mechanics, hip weakness and carried load explain far more cases. Check your pattern against the comparison table above before assuming stenosis.
3. How can I change my gait to get relief right now?
Shorten your stride by about 10%, lift your cadence 5–10%, soften the ribcage down and let the arms swing freely. Most people feel a difference within the same session. If those cues help, you are dealing with a loading problem, which is good news.
4. How far should I walk if it starts hurting at ten minutes?
Walk about eight minutes, not fifteen. Stay just inside your current distance-to-onset, repeat that dose regularly, and extend by two to three minutes every other session once you finish comfortably and wake up no worse. Repeatedly walking into pain tends to keep tolerance exactly where it is.
5. What shoes help with walking-related back pain?
A comfortable, moderately cushioned shoe with a stable heel suits most people. Extremely rigid soles on concrete amplify impact, while very soft, unstable shoes make the hip work harder. Replace them when the midsole stops rebounding, not when the upper looks worn.
6. Should I avoid hills?
Avoid long, steep descents early on, since downhill walking loads the spine in extension. Level ground or a mild incline usually feels better, and an incline that lets you lean slightly forward is often the most comfortable option in a stenosis-type pattern. Reintroduce descents gradually.
7. Will core exercises really help?
Yes, particularly anti-rotation work such as Pallof press-outs and dead bugs, combined with lateral hip strength. The combination keeps the pelvis level over distance, which limits the repetitive micro-movements at the lumbar spine that accumulate into pain.
8. Can a backpack be the cause?
A heavy or poorly fitted pack can be. Use both straps plus a chest strap, and keep the load high and close to your torso rather than hanging at the base of your spine. As a rough guide, the closer the weight sits to your center of mass, the less extension force it creates.
9. Do I need a scan?
Most people do not. Imaging is reserved for red flag symptoms or for pain that persists despite a genuine trial of rehabilitation, largely because findings such as disc bulges and degenerative change are common in people with no pain at all and rarely change the first-line plan.
10. What is the best warm-up?
Three to five minutes of ankle rocks, open-book rotations, and a couple of short bouts at a quicker cadence. Then start the walk itself with deliberately short steps and an easy arm swing for the first few minutes, which reduces the early symptom spike many people report.
Medical disclaimer
This article provides general education about a common movement-related problem. It is not a diagnosis and cannot account for your history, examination findings, or other medical conditions. If your symptoms are severe, progressive, or accompanied by any of the urgent findings listed above, arrange an in-person assessment rather than self-managing.
References
- Pocovi NC, Lin CC, French SD, et al. Effectiveness and cost-effectiveness of an individualised, progressive walking and education intervention for the prevention of low back pain recurrence in Australia (WalkBack): a randomised controlled trial. The Lancet. 2024;404(10448):134–144. doi:10.1016/S0140-6736(24)00755-4. https://pubmed.ncbi.nlm.nih.gov/38908392/
- Munakomi S, Foris LA, Varacallo MA. Spinal Stenosis and Neurogenic Claudication. StatPearls. Treasure Island (FL): StatPearls Publishing; updated 13 August 2023. https://www.ncbi.nlm.nih.gov/books/NBK430872/